
Brown Sack Easter Masks DIY. Mar 19 This week, we had a few extra shopping bags lying around our house.
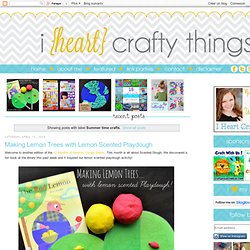
So in honor of the season, we decided to transform them into funny Easter Animal Masks. These are easy for kids to make, so it’s a great activity to do as a family. And they’re the perfect way to keep kids entertained during that Easter brunch. Materials: Scissors, Glue, Brown Paper Grocery Bag, Tape, Construction Paper (yellow, orange, red and pink for chick; white, pink and black for lamb and bunny) For Chick: Step 1: Cut out the shapes the chick; 1 large oval for the face, 2 small pink circles for cheeks, 1 big orange beak, 1 small orange beak, 1 fluffy feather shape for the head, 2 wings Step 2: Lay the shapes on top of the bag and arrange in a pleasing manner, once you’ve got them where you like them, start gluing.
Step 3: Glue the wings on by folding a 1″ flap and attach them to the sides of the bag. Step 4: Don’t forget the cute yellow feathers on top of the head.
Papertoys - pour débuter. Paper Replika. Papercraft Paradise. Summer time crafts. I have been trying to sneak some learning into our Summer fun this year.
I grabbed this book at the library and it created the perfect opportunity for us to go explore a Pond. While the book is geared towards preschool age children, I got my boys (6 and 8) involved by helping to read the book to my toddler. Pond Walk by Nancy Elizabeth Wallace I also made this little Pond Scavenger Hunt worksheet for our trip to the Pond. You can either circle or color all of the things you were able to find on your pond walk. (This worksheet is for educational purposes only. We first visited a small man made pond at a local Village shopping center (Gardner Village). My kids got up close and personal and noticed some tadpoles and small fish in the water. It was the perfect small outing for a Sunday afternoon and it got my kids pumped up to explore something bigger.
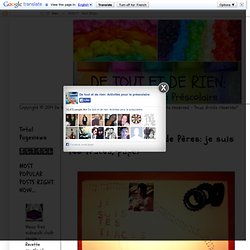
Our next adventure was at Willow Pond in Murray, Utah. Some of our favorites... Beautiful, blue dragonflies. Lots of Mommy and baby ducks. BRICO / Succulent in corks - these are adorable! Récupéré: Activités pour le Préscolaire: Bricolage pour la fête. Un bricolage simple et qui attendrira le coeur de tous les papas...
A creative mama doing creative things!: DIY Wax Paper Lantern. With a busy toddler, sometimes it can be hard to come up with something fun to make that will keep her interested and, most importantly, learn something once we're done.
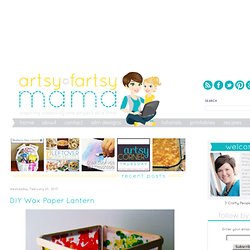
This kid's craft covered a little bit of construction skills, colors and color-mixing, and creating unique artwork. With a few simple supplies, you can create a cute and colorful wax paper lantern and have a great time! To make a wax paper lantern, you'll need: Wax Paper {any brand should work great} Crayons in multiple colors Iron Scrap Paper or Newspaper *Depending on the age of the child, I would highly recommend a bit of adult supervision. Step 1: Cut or tear a piece of wax paper off the roll about 10-12 inches long. Step 2: Depending on how hard you or your child can color, you can color your own design on one half of the wax paper sheet.
Step 2.1: Since we couldn't draw a dark enough image, we did the next best thing: place crayon shavings into separate paper cups. Now your lantern is done! Spring Kid's Craft. Hello!

Kristen here with a fun craft for kid's! These cute, crafty and earth friendly toilet paper roll butterflies are so colorful, and easy to make. You could make just one, or a big flock of them. They are sure to brighten any spot you put them. First, you will need: Bobunny dot cardstock, a toilet paper roll, Bobunny double dot ribbon, googly eyes, a 1.5 inch flower punch and a 1/2 inch circle punch, and adhesives. To create the base of the butterfly, I cut a piece of cardstock into a 4.25 x 5.25 inch rectangle.
Next, cut two 3 inch strips of ribbon. Now we can work on the wings. Trace the wing pattern onto cardstock, and cut out. To finish the butterfly, place adhesive along the middle of the wings, and adhere to the back of the finished tube. Hope you enjoy my fast and fun butterfly project! Kristen. 25 Adorable Easter Craft Ideas. Enfants. Projets arts maternelle. DIY Kids. Sites pédagogiques. Idées bricolages.