
Landee See, Landee Do: Festival of Trees: Folded Paper Trees. Free fonts from Scrapbook Links.net - Your source for scrapbooking supplies and more! Templates. These cute purses are so easy to make!
It won't take you more than 30 minutes. Wouldn't they be a perfect gift for mom. Put a gift certificate inside to her favorite store/restaurant. And don't forget "Teacher Appreciation Day" May 5! Print out this template on a 8 1/2" x 11" cardstock. When you are done cutting you will have 4 pieces like this. Fold the sides so it looks like a "M". Put glue to both sides with fast drying adhesive. Glue the sides to the purse (after you folded the purse in half) with the narrow side down.
Glue the lid to the back of the purse. Take a ribbon through one of the holes and make a little knot. On the front of the purse,add a button,brad or whatever you like. Last - put 5/8" Velcro round with sticky back to the inside of the lid and the other part of it to the purse. Inking,doodling,Stickles..it would all look good here. If you give this a try, I would love to see the result. Who knows, maybe I decide to send out some RAK's;) Easy Origami Box Instructions - How to make a Simple Origami Box. The origami box is simple to make, and can be used to hold other origami pieces.
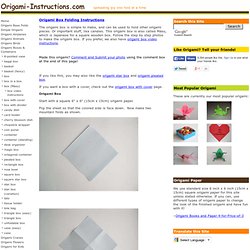
Or important stuff, like candies. This origami box is also called Masu, which is Japanese for a square wooden box. Follow the step by step photos to make the origami box. If you prefer, we also have origami box video instructions. Made this origami? If you like this, you may also like the origami star box and origami pleated box. If you want a box with a cover, check out the origami box with cover page. Origami Box Start with a square 6" x 6" (15cm x 15cm) origami paper. Flip the sheet so that the colored side is face down.
Using the mountain fold lines as guides, fold the four corners of the paper into its center. Then fold the right edge and the left edge into the centerline. Now fold the top edge down and the bottom edge up, as shown below. Then I'm going to ask you to undo the last two-and-a-half steps! Create * Sell * Buy * Share - Buy Handmade Paper Crafts and Paper Arts. Finally, as promised, the tutorial!
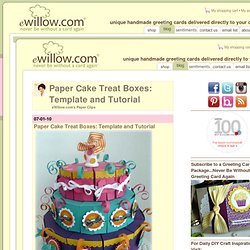
Yes, it really did take me two days to get this ready. I hope you enjoy it. Be sure to create a FREE studio on eWillow.com and upload photos of your cakes when you are finished. You can even sell them, too! Click HERE for more details. Also, to help spread the word about eWillow.com and to build our community, please link to this tutorial and share the news that eWillow.com is FREE to use.
Now, on to the tutorial! Supplies Download the Template (Print the template directly onto the cardstock. If you have a Cricut machine, click HERE for the template Scissors Hole Punch. 1108b_santaclaus_papercraft.