
Adobe-rigel-photoshop-ipad,48291.html?utm_content=buffer994a6&utm_medium=social&utm_source=twitter. Adobe avait retiré en mai dernier son application Photoshop Touch de l’App Store, qui faisait alors office d’adaptation du logiciel de retouche d’images pour iPad, et avait alors présenté son nouveau projet, nommé Rigel.
Aujourd’hui, l’éditeur donne plus d’informations sur cette nouvelle application, et annonce qu’elle sera disponible gratuitement dès le mois d’octobre. Adobe annonce donc que Rigel, le nom de code de sa nouvelle application pour iPhone et iPad, devrait proposer une meilleure interaction avec les application de l’éditeur sur Mac et PC, et ainsi faire des appareils iOS de véritables compléments de l’ordinateur pour la retouche d’image, et plus simplement des appareils à part. Il serait par exemple possible de commencer un travail sur sa tablette pour le continuer sur un ordinateur, le tout en passant par un service de Cloud fourni par Adobe. ?utm_content=bufferb07b9&utm_medium=social&utm_source=twitter.
Vintage, retro, moody, classic are all adjectives that might be used to describe black and white photographs.

It may seem counter-intuitive in an age where cameras are lauded for their abilities to render colors and skin tones in super accurate or pleasing ways, to just go and eliminate all the colors in post-processing. Nevertheless, the timeless qualities of grayscale images continue to persist, and the alluring beauty shows no sign of subsiding. Since most of us see in color, black and white images seem to be inherently abstract. In Lightroom (LR), the transformation of a photo from color to black and white is simple – drag the Saturation slider all the way to the left. The end. ?utm_content=buffer7340b&utm_medium=social&utm_source=twitter. Editor’s Note: This is part a series on macro photography this week.
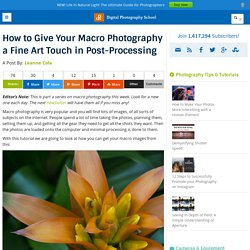
Look for a new one each day. The next newsletter will have them all if you miss any! Macro photography is very popular and you will find lots of images, of all sorts of subjects on the internet. People spend a lot of time taking the photos, planning them, setting them up, and getting all the gear they need to get all the shots they want. Then the photos are loaded onto the computer and minimal processing is done to them. ?utm_content=buffer923a1&utm_medium=social&utm_source=twitter. One of my favourite portrait techniques is to isolate the model by using a short telephoto lens and a wide aperture.
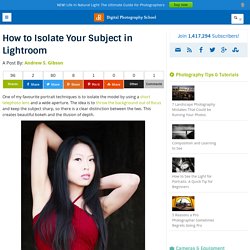
The idea is to throw the background out of focus and keep the subject sharp, so there is a clear distinction between the two. This creates beautiful bokeh and the illusion of depth. Another way to isolate the model is to place them in the light, against a dark background that is in the shade. The opening photo (above) used this technique. I asked the model to pose in a doorway, and she is separated from the background because there’s no light illuminating the interior of the building. These techniques are very effective but sometimes the results won’t match what you visualized.
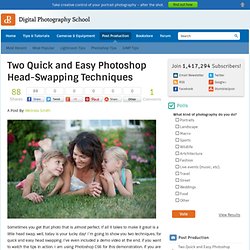
Take the following photo as an example. In the event however, that didn’t happen. This is the photo, more or less straight out of the camera. Quite a difference! I added a Radial Filter and moved the Exposure slider left to darken the area around the subject. The Mastering Lightroom Collection. Two Quick and Easy Photoshop Head-Swapping Techniques. A Post By: Melinda Smith Sometimes you get that photo that is almost perfect.
If all it takes to make it great is a little head swap, well, today is your lucky day! I’m going to show you two techniques, for quick and easy head swapping. I’ve even included a demo video at the end, if you want to watch the tips in action. First Look At 3D Camera App 3DAround. What if you could shoot those cool 360-degree, swivel-around photos you see on ecommerce sites or in The Matrix with just your smartphone?
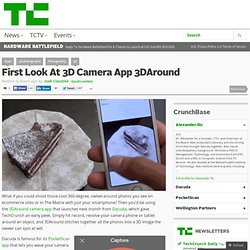
Then you’d be using the 3DAround camera app that launches next month from Dacuda, which gave TechCrunch an early peek. Simply hit record, revolve your camera phone or tablet around an object, and 3DAround stitches together all the photos into a 3D image the viewer can spin at will. Dacuda is famous for its PocketScan app that lets you wave your camera over a document to get a digital image of it without a bulky scanner. Now Dacuda’s 25-person team and 5 years of experience are combining to make your phone a 3D scanner that always gets the perfect angle…because it gets every angle. For starters, it’s going to add some 360-spice to a ubiquitous but often boring type of photography: food porn. Lightroom : Adobe sort son module d'import Aperture et iPhoto. 25 Best Photoshop Logo Design Tutorials.
Logo designing was a difficult task before and only professional designers and agencies could do that.
However, the time has been changed dramatically and now almost everyone can create his logo easily by following very simple steps. First of all you should have little Photoshop skills, if you do not know how to use Photoshop, do not get panic you can still create awesome logos and I will tell you how to make this true. Let’s proceed with some mind blowing logo design tutorials that can make you a professional designer without any prior experience and practice. Comment protéger ses photos en ligne : 8 guides pratiques.
Passer d'Aperture à Lightroom ? Adobe vous aide. Explorez la photo urbaine et Lightroom (4) : les outils de développement de Lightroom. ?utm_content=bufferc7665&utm_medium=social&utm_source=twitter. Photographie numérique : Sony a créé un capteur d’images courbe. ?utm_content=buffer961ec&utm_medium=social&utm_source=twitter. It’s our responsibility as photographers to use the interplay of light and shadow on our subjects to create the third dimension in our two-dimensional media.
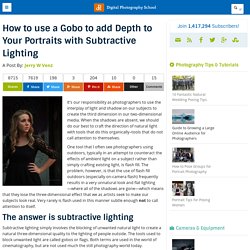
When the shadows are absent, we should do our best to craft the direction of natural light with tools that do this organically–tools that do not call attention to themselves. One tool that I often see photographers using outdoors, typically in an attempt to counteract the effects of ambient light on a subject rather than simply crafting existing light, is flash fill. The problem, however, is that the use of flash fill outdoors (especially on-camera flash) frequently results in a very unnatural look and flat lighting—where all of the shadows are gone—which means that they lose the three-dimensional effect that we as artists seek to make our subjects look real.
Very rarely is flash used in this manner subtle enough not to call attention to itself. The answer is subtractive lighting. AkaFaust : #Photo : le mode manuel pour ... DSLR tips for beginners: how to use Manual mode. What it is While in anything other than full auto mode you can control all a camera's settings, but only Manual mode lets you adjust aperture and shutter speed independently.
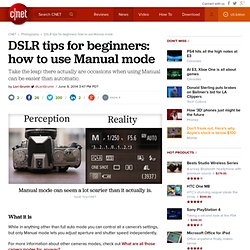
For more information about other cameras modes, check out What are all those camera modes for, anyway? Who can use it Anybody with a mode dial on their camera, physical or virtual, dSLR, interchangeable-lens mirrorless, advanced compact or even a phone with manual controls. How to do Long Exposure Photography and Light Trails at Night. Gastown light trails, Vancouver, Canada Before I understood how photography worked, I was always intrigued by light trails in images.
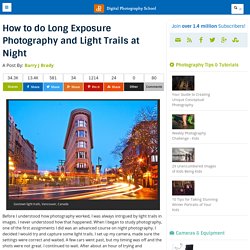
I never understood how that happened. When I began to study photography, one of the first assignments I did was an advanced course on night photography. I decided I would try and capture some light trails. I set up my camera, made sure the settings were correct and waited.