background preloader

Baby

Facebook Twitter

Make Your Own Moby Wrap Tutorial. I love babywearing. Love, love, LOVE. I borrowed my sister-in-law's Baby Bjorn and used it for the first time when Monkey was 3 weeks old. She was asleep within seconds. Sleep. Something she hadn't done without great effort on my part since she was born. But by the time she hit about 12 pounds, the Baby Bjorn was killing my back. *Note: this is my first attempt at a tutorial, so if anything doesn't make sense, please feel free to ask questions. Here's what you need: 5-6 yards of cotton gauze (I'm short and can get away with 5 yards. How to do it: First, wash your fabric (I always pre-wash). Cut along the fold so that you have 2 pieces of fabric, each roughly 20 inches x 6 yards (or however long you chose to make yours). Trim off the rough edges. Now it's time to sew the edges to minimize fraying. You're done! Please ignore my dirty bathroom mirror. Happy Babywearing!

Paper Globe Mobile. Remember when I posted this idea a while ago? Shorty thereafter, I was contacted by an editor from Photojojo who asked me to write a tutorial to make *photo* globes. Oh, and I should mention that right after I received the email request, I was browsing the shelves at my local Barnes and Noble bookstore and I saw a book: Photojojo: Insanely Great Photo Projects and DIY ideas. Whoa, I thought! They have a book out? HOW COOL that they asked me to contribute to their website! I wanted to share the tutorial with you!! This is the link to my Photojojo write-up, but I've also included the photo steps below. Materials: Photos Cute craft paper Scissors Glue gun Scoring tool Wire Paper Punch Step 1 Step 2 Step 3 Step 4 Step 5 Final Product!

It's hanging in my son's room now and he loves to point out mommy, dad, and himself :) Paper Ladybirds. Now that spring is here and the weather is warming up, you and your kids will love this adorable twirling ladybug project! They spin and twirl and look so cute, all you need is a little breeze. These would be a fun decoration for a birthday party, barbecue or just to dress up your child’s bedroom or playroom. First watch this video, it shows the ladybugs in action… Fun huh??

Ok let’s make some! You will need two construction paper circles for each ladybug. Holding the stacked paper together, cut the circles out of the paper. Still holding the two circles together, cut a slit from one edge of the circle up into the middle of the circle. Use as many colors as you like. Place one of the circle onto a piece of scrap paper. For each pair of circles, you will paint a head at the opposite end of each one. Use the small spouncer dipped in black paint to add the ladybug’s spots.

Take the two circles and line up the slits. Now you are ready to hang your twirling ladybugs! Author: Amanda Formaro. Paper Elephant Mobile. Though it may seem I've forgotten this wee little blog lately, I promise I have not. I have several projects swirling that aren't quite ready for prime time, but in the meantime, I wanted a way to showcase some of the patterns I have made that I really dig but that probably won't be making it onto fabric anytime soon. It seems like everyone I know is about to have a baby these days, so I've been thinking about the sweet stuffed elephants my mom's friend made for me and my sister when we were babies.

Of course, I have neither her sewing skill nor her patience, so stuffed elephants will not be making an appearance at any baby showers in my vicinity anytime soon. Instead, these elephants are ready to be printed, trimmed, and framed (each is 8"x10") for gifting. But you know, I can never let well enough alone. I had so much fun with the elephants that I wanted to do another animal. I stuck with the exotic theme for these crocodiles.

And last, but not least, these are my favorites. Paper Circles Mobile. Fabric Nursing Cover Tutorial. When I had Wyatt, my dear friend Heather sent me two (not one, but two) nursing covers that her mom and sister had made. I don’t know what I would have done without them and since then I’ve made some for friends, and can’t wait to make myself a new one for my soon-to-come little boy. Since I’ve made enough now to know how I like them best, I decided I would make my own tutorial to share with you all. Description: A stylish and practical nursing cover. The dimensions are slightly larger than most nursing covers, which gives added coverage and less chance of someone getting an uninvited sneak peek! You will need: 1.25 yd fabric (home décor weight works best) 16” boning (in fabric casing) 2 D-rings (1.25”-1.5”) Fabric pieces to cut: · one rectangle 28”x40” for main body · one strip 4.25”x10” for neck strap · one strip 4.25”x26” for neck strap Directions: 1. 2. 3. 4. 5. 6. 7. 8. 9. 10. 11.

Give it away as a gift or keep it for yourself! Fabric Door Catch Silencer. Fabric Balls. Updated May 2011 with easier access to the free pattern. (See below) This is my favorite gift to make for my grandchildren when they turn 1 year old. It's perfect for little fingers to grab as they chase it around a living room or play room. The finished ball is about 8" in diameter. Update November 2012: Here is a video of a 6-month-old baby successfully playing catch with one of these balls. They are WONDERFUL for babies! Materials: You can make it with a variety of fabric scraps, or with two colors (one for the outer surfaces, and one for the inner surfaces). Directions: Cut out 12 of the half-circles and 12 of the football shapes (see pattern below). Here's another picture of the tiny snip. Then lay a half-circle and a football shape together like this. The stitching will go in the direction from the bottom of the half-circle up to the middle, BUT don't start at the very bottom!

You will begin stitching about 1/4" from the bottom corner, (see where the scissors are pointing to?) See? Fabric Little Teepee. Fabric Tee Pee. From Beth: Meg created this tutorial for you to enjoy. 
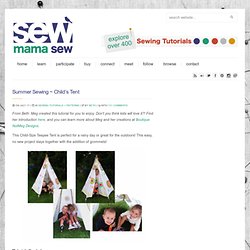
Don’t you think kids will love it?! Find her introduction here, and you can learn more about Meg and her creations at Boutique NutMeg Designs.

This Child-Size Teepee Tent is perfect for a rainy day or great for the outdoors! This easy, no sew project stays together with the addition of grommets! Materials Needed: 6- 6ft bamboo garden post (can be purchased at Home and Garden Centers)3 yards of 60 inch wide white painter’s canvasScissorsPenCraft paint & brushes3 Strong rubber bands6 plastic 1 ½ inch ringsEmbroidery floss or strong threadSewing needle with large eye12 Large Grommets & grommet setting kit (I used 1/4”)HammerRibbon approximately 3 yards for lacing (additional ribbon for decorating is optional)Straight pins Step 1 Hold all 6 bamboo post in your hands wrapping the 3 rubber bands tightly around the posts leaving about 4 inches at the top. Step 2 (Steps shown in diagram above) Step 5 Grommet time!

Step 9 Have lots of fun! Knitted Chick & Egg. Fabric Yertle the Turtle Crinkle. Fabric Purl Bee Penguin. Winter in New York City can be hard to love with its frozen sidewalks, dirty snowbanks, and bare trees. 
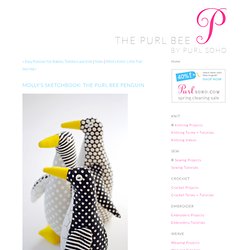
But this winter I'm counting on my new cold weather friend, the Purl Bee Penguin, to help me through! Its happy ovoid shape and graphic palette are sure to remind me that joy really does exist in January. Just ask an Emperor Penguin! I used our new Penguin Fat Quarter Bundle, a lively mix of black and white dots, stripes, and prints, to sew up this quirky little trio of penguins. I loved seeing how each one developed its own personality as I sewed, becoming more and more alive with each stitch!

They are also real crowd pleasers. Even my non-sewing thirty-something friends all oohed and aahed when they saw my penguins lined up on my ironing board. The Purl Bee Penguins are pretty addictive to make, and I don’t think that I’ll be able to stop with just these three. Materials To make three 9-inch tall stuffed penguins: Cutting Cut out the fabric according to the directions on the template. Fabric Pig & Piglets. This big pig has a zippered pocket containing six (or more, if you like) little piglets that look just like her! 
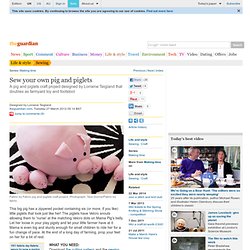
The piglets have Velcro snouts allowing them to 'nurse' at the matching Velcro dots on Mama Pig's belly. Let her loose in your play pigsty and let your little farmer have at it. Mama is even big and sturdy enough for small children to ride her for a fun change of pace. At the end of a long day of farming, prop your feet on her for a bit of rest.

Finished dimensions — Mama Pig is 12" tall x 20" long x 14" wide; Baby Pigs are 3" tall x 4 1/2" long x 3 1/2" wideSeam allowance — 1/2" unless otherwise specified 1. Pig side snout and pig tail (cut 2)Pig upper body (cut 2)Pig side body (cut 2)Pig lower body (cut 2)Pig ear (cut 2)Pig snout front (cut 1)Piglet body 5 per piglet (cut 30)Piglet snout 1 per piglet (cut 6) Cut from white felt:Pig ear (cut 2)Piglet ear 2 per piglet (cut 12) Cut from brown felt:Piglet foot 4 per piglet (cut 24) 2. 3. 4. Step 5. 5. 6. Step 7. 7. Step 8. 8. 9. Crochet The Happiest Blanket. Crochet Granny Spiral. Author PKOlson Introduction Spiraling Granny Square Pattern. 
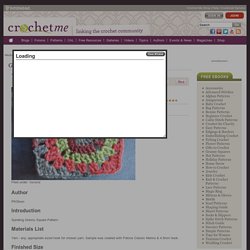
Materials List Yarn - any, appropriate sized hook for chosen yarn. Finished Size Varies based on yarn & hook size chosen. Gauge Notes This motif begins with a four-color spiral. Colors A, B, C, D (each color is used, in turn, on each round) Magic Circle (adjustable) loop.

Make a large loop by putting the yarn tail behind the working yarn (the yarn coming from the skein). The Pattern Begin with color A and a Magic Circle (adjustable) loop. Rnd 1: * [1ch, 1sc, 1hdc, 2dc] in ring, remove hook, joining colors B, C, & D in ring in turn, repeat from *. Rnd 2: Continuing with color A, * [2dc in next sc, 1 dc in next hdc, 2dc in nex dc, 1 dc in next dc], repeat from * with colors B, C & D. Rnd 3: Continuing with color A, * [ch 2, 1 dc in next dc, sk 1dc, 2dc in each next 2 dc, sk 1dc, 1dc], repeat from * with colors B, C, & D. Rnd 4: Continuing with color A, *{in ch2 sp (2dc, ch2, 2dc), [sk 1dc, ch1, 2dc in next End off. Knitted not so baby yoda. We love the baby yoda by Cari Luna. I made this one for Wil when I was pregnant and he's worn it a lot. A LOT. At 6 months it really is a little small for him now.

He's still wearing it mind you, but its days are definitely dwindling (especially in the length). Because I couldn't face a future without the yoda, I decided to try and make the next size up by altering the original pattern (available here). The not so baby yoda knitting patternBy sooz - www.soozs.blogspot.comAn addition to the totally fantastic original new born pattern available here. Size: 6 to 12 months (27cm wide; 33cm long)Yarn: 4 balls 127 Print (166gms or 283m used)Gauge: 18 sts/ 24 rows = 10cmNeedles: 4.5mm (or size needed to obtain gauge) BackCast on 50 sts.Rows 1- 6 moss stitch.Rows 7-71 stocking stitch, starting with a knit or right side row.Row 72 Cast off first 7 stitches and purl to end of row.Row 73 Cast off first 7 stitches and knit to last stitch then turn.

FinishingSew fronts and back together at shoulders. Fabric Baby Footies Pattern. Kimonoshoes. Fabric Diaper Bag Pattern. Yet another free diaper bag pattern for my readers and wow, this one is a beauty. This gal took many weeks of designing and tweaking, yet I'm still giving her away for free. Roomy enough to hold all your baby gear yet still cute. This isn't a big bulky tank, this bag has style! I call it "The Detour Diaper Bag" because having a baby puts your life on detour...but it is a scenic route worth taking. Enjoy! Due to popular demand, I'm now offering Limited Production Licenses so you can make and sell these diaper bags in your own shops or at craft fairs!

Materials Needed: 1.5 yards canvas or other sturdy fabric1.5 yards lining fabric1/2 yard patterned fabricmagnetic snap, 7" zipper & velcrointerfacing (optional)pins, scissors, sewing machine, etc Here is The Detour Diaper Bag - free diaper bag pattern in PDF format. It will print on 7 regular letter sized pages for you to tape together. First, print out the pattern pdf from the link above and tape the first six sheets together. Like magic! Fabric diaper bag tutorial. Want to make a hip diaper bag that your friends will envy and you will love for both its style and its practicality? This diaper bag tutorial will make a bag that’s large enough to hold all your baby’s needs with room left over for your must-haves too!

Features include being fully lined and spacious interior pockets that you can customize. Interior pockets can be made using lining fabric or exterior fabric for contrast. You will need: (affiliate links below)Exterior Fabric – 1 yd (1.25 yd if making interior pockets using exterior fabric for contrast) – home décor weight fabric works best Lining Fabric – 1.25 yd (1 yd if making interior pockets using exterior fabric for contrast) – home decor weight fabric works best Lightweight Woven Fusible Interfacing – 1.5 yd ¼” elastic – 1 yd ½” double fold bias tape – 1.5 yd Magnetic snap Your favorite sewing music (I recommend John Mayer, Ben Harper, and Jack Johnson) Pieces to cut (see diagram if you want to ignore my writing): Directions: 1. 2. 3.