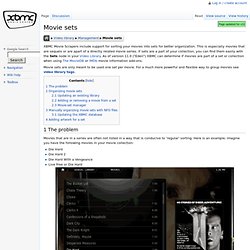

Movie Sets. XBMC Movie Scrapers include support for sorting your movies into sets for better organization.

This is especially movies that are sequels or are apart of a directly related movie series. If sets are a part of your collection, you can find them easily with the Sets node in your Video Library. As of version 11.0 ("Eden") XBMC can determine if movies are part of a set or collection when using The MovieDB or IMDb movie information add-ons. Movie sets are only meant to be used one set per movie. For a much more powerful and flexible way to group movies see video library tags. 1 The problem Movies that are in a series are often not listed in a way that is conducive to ‘regular’ sorting. Die Hard Die Hard 2 Die Hard With a Vengeance Live Free or Die Hard 2 Organizing movie sets From XBMC version 11, Eden, movie sets data is downloaded automatically when you scan movies into the library. To enable organizing movies in sets, go to Settings -> Videos -> Library and select Group movies in sets.
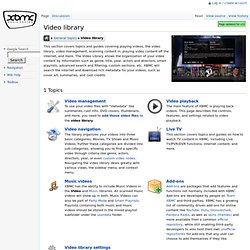
Video Library. This section covers topics and guides covering playing videos, the video library, video management, scanning content in, playing video content off the internet, and more.

The Video Library allows the organization of your video content by information such as genre, title, year, actors and directors, smart playlists, advanced search and filtering, custom sections, etc. XBMC will search the internet and download rich metadata for your videos, such as cover art, summaries, and cast credits. 1 Topics 2 How-to's HOW-TO:Backup the library Custom home items Edit decision list Internet video and audio streams HOW-TO:Modify the video cache HOW-TO:Update librtmp.
Quick Start Guide. Congratulations, new user, in your choice of media center software: Kodi!

This guide is designed to get you up and running with Kodi in the shortest time possible, and was written with the most typical use cases in mind. For more in depth information please refer to the Kodi online wiki manual The Kodi interface is designed with the 'Home Theater' in mind. This means it is best viewed on a large-screen TV while you sit on your couch 10-feet away from that TV, rather than on a small monitor while you sit at your desk.
Because everything is designed with the home theater experience in mind, the best way to interact with Kodi is with a remote control, rather than a computer mouse. 1 Installing Kodi Kodi can be installed on a wide range of supported hardware, from normal desktop computers, ARM powered tablets and phones, to tiny set-top-boxes, and more. If you haven't already done so, download Kodi from or see the installation guides here: See the Installing page for additional guides. Adding Media Sources. Media Sources are virtual links to the content you wish XBMC to use. When you enter any of the Videos, Music, Pictures or the Filemanager, you will see an entry for "Add Sources". When you first start with XBMC you should at least add one source, like a drive or directory on your XBMC device to get you started. If you select "Add sources" a dialog appears, where you may manually input a path, or browse to a source that contains media that you would like XBMC to use and display.
As an example, if you enter the Music section, you could tell XBMC where it should look for your music. This can be as simple as selecting a folder on your computer or you can also choose to browse your home network for media. 1 Adding media sources You can select as many sources you like if you have content in different places. 1.1 Root file selection By default every root section includes a Add Sources button that you can click to start adding sources. 2 Add source window 3 Network file sharing See: File sharing. Comparison of skin features.