
Method of Action. How to Create a Self Portrait in a Geometric Style. In this tutorial we’re going to talk about how to create an illustrated self-portrait in a geometric style.
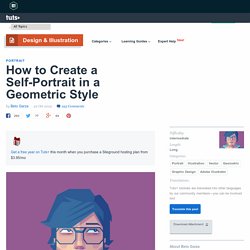
We’ll be using a photograph of ourselves as the base of the illustration, drawing a sketch from that, and then creating the final piece. Let’s get started! Since posting this tutorial, readers have been inspired to create their own self portraits in this style. Check out what they’ve achieved over on a special edition of Tuts+ Workshop: Created by You. First, we take or select a photo. Now, create a New Document (cmd+N or ctrl+N) in Adobe Illustrator with an artboard size of 600 x 480px. We are going to organize the layers as follows: The top layer is named “Draw”.
Lock the "Background" and "Photo" layers. Now you can delete the "Photo" layer. Change the Opacity of the sketch to 30% and lock the "Sketch" layer. Now, start drawing from back to front using the Pen Tool (P). For the t-shirt, just draw one half of it, then Copy (Cmd + C) and Paste in front (Cmd + F). Stop Making Bad Logos. There's article after article on websites that talk bout how to make a great logo.

But If you're a logo machine, and you've been doing it for a long time, chances are that you've developed some pretty awful habits. How do I know this? Because I suffered from some of the same habits I'm about to talk about. A true master of logo creation will refine their work on every project, forcing themselves to get better with each design. It all boils down to a few key things to avoid when you're creating a logo. Throw Out Extreme Detail and Intricacy While some of the best designers and illustrators often find themselves wanting to flex their illustrative muscles, and express the insane levels of detail they're capable of producing, this often makes for terrible logos. Take a look at these examples of the old and new Nike and Apple Logos. If I was Isaac Newton, I'd Sue. Never Use Other Peoples Stuff. Blacktap.jpg (400×300) 182044009907232637_HloIRI4o_c.jpg (466×472) Invention of Love (2010) - Animated Short Film. Brain of Alex Young: News.
Deine Mappe kunstschule wandsbek kommunikationsdesign studieren. Diese Definition, was eine Mappe ist, solltest du ganz genau lesen. Und dann noch mal. Denn neben deiner Vorbereitung auf das persönliche Beratungsgespräch und deinem Auftreten wird vor allem deine Mappe darüber entscheiden, ob du an der Kunstschule Wandsbek aufgenommen wirst oder nicht. Anforderungen der Kunstschule Wandsbek an deine Mappe das Format muss mindestens DIN A4 betragensie umfasst eine Auswahl von 15 – 20 Arbeitendie Aufmachung muss sauber und durchdacht sein Deine Auswahl kann beinhalten: Bleistift- und KohlezeichnungenIdeenskizzen/Scribbles in unterschiedlichen TechnikenMalerei (ab Größe DIN A2 bitte abfotografiert)Illustrationenkünstlerische Projekt-Dokumentationenkünstlerische Arbeiten, in denen Text/Schrift integriert istFotografieCollagengegenständliche 3D-Arbeiten (von allen Seiten abfotografiert)Am Computer erstellte Arbeiten (Ausdruck oder auf USB-Stick im Dateiformat .jpg, pdf, .mov) Was deine Auswahl uns sagen muss.
Ulf Jenninger Grafikdesign - Leipzig. The Anatomy of a Horrible Web Design Client (Infographic) Although a web designer may have an artistic nature that prefers to design websites rather than contracts, he or she needs to know how to run a business.

Part of operating a business involves making sure that clients sign legal contracts that protect the web designer from losing money. It may be helpful to pay a professional lawyer a nominal fee to look over the potential contracts. Another option is to pay an attorney to write the contracts. A written contract that is legally binding prevents the horrible web design client from taking advantage of a web designer's good intentions. A contract should state that a substantial deposit is required before the web designer does any work, and it needs to mention the percentage amount of this deposit. From : Also Check : Merging the worlds of Edge and Muse « Adobe Edge Team Blog.
Edit June 16 2012 – The following post is a way to integrate your Edge content without the use of iframes.

For detailed information on how to integrate your Edge compositions using iframes (which will also allow you to preserve your Muse project for editing) visit the Muse documentation page here. This post will show you how to integrate your Edge compositions into Adobe Muse. Be warned, this does involve some code – BUT – don’t let this intimidate you! If you’re the type that would rather poke a fork in your eye than code, fear not.
All we’ll be doing is copy and pasting. This post also assumes you have the basics of Muse and Edge down and is not a tutorial on how to use either.