Mother’s Day Cards to Make or Buy. {DIY Wedding Tips} Burlap, Linen & Tulle Wreath. If you missed it Sunday, I shared all my wedding pictures & details from our sweet day!!
If you did get a chance to see it, you may have noticed quite a few little projects scattered throughout the decor!! I mentioned that a ton of it came from my own house but a lot of things were made specially for the big day :) And if you're no stranger to Tattered & Inked, you know that I love a good wreath. So much so that I think I ended up with about five wreaths at the wedding. This one topped them all though but be warned, it was quite a bit of work!! If you hate cutting, cutting, cutting & then gluing, gluing, gluing, you probably won't be friends with this wreath :) Classroom DIY: DIY Memo Board. DIY Memo Board.
DIY Wire Star Photo Holder. We’re super excited to introduce our newest craft contributor, Victoria Hudgins.
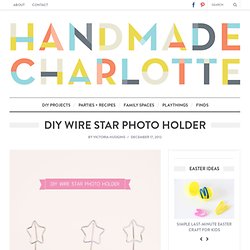
Victoria is the editorial manager for Alt Design Summit and the author of A Subtle Revelry, where she shares her passion for the art of merry making. Enjoy! Add a little cheer that will last even after the holidays are through by making a sweet collection of DIY photo holders. Every year growing up, we would always receive a photo holder for Christmas to display our favorite photo from the season. It makes such a difference come January to have a few happy snaps sitting around the room or on your desk, and it’s a great way to help your kids make the transition back to normalcy after all the hoopla of the holiday season. Materials Simple wooden blocks (found at craft stores)PaintHeavy gauge floral wire Step 1 Paint the blocks using bright colors to cheer winter blues away. Step 2 Cut the wire to size (the stars pictured above are 8-in. long).
Happy crafting! 40 Remarkable Examples Of Hand Lettered Calligraphy.
Seed Packet Favours. Looking for a garden friendly favour for a spring wedding or a bridal or baby shower?

These colourful seed packets a fun way for guests to take away a lasting memory. These seed packets are even cuter when displayed on wire curlicues like butterflies fluttering around. Perfect considering they are filled with a blend of seeds for attracting butterflies! For the complete instructions on making these delightful favours, check out the full post at the My Own Ideas Blog. style=”display:inline-block;width:336px;height:280px” data-ad-client=”ca-pub-2008610541549994″ data-ad-slot=”5302597541″>
DIYable. DIY. FIDM Scholarship Store - Downtown - Los Angeles. Kenneth Jay Lane Strawberry Necklace. Sweet!
This cute necklace by Kenneth Jay Lane looks like a piece of candy! Best of all, you can make it yourself and save about $115. Super sweet! Red is traditional, but I am NOT a traditionalist. Yes, mine is turquoise. All you need is some leftover polymer clay and a few more "ingredients".... Step 1: Gather materials. Step 2: Shape your clay into a strawberry shape. Step 3: Flatten those teardrops and attach them to the top of the strawberry. Step 4: Take your little stud decal; pick off one of the gold studs and press into your strawberry. DIY: Marquee Letters. I’ve said this before, but I have no problem saying it again.

I love Ashley at Sugar & Cloth. She’s super creative and her DIYs are projects that I would actually make. You know, there are lots of DIYs that I’d pin, but never make. Today’s fab project from Ashley is on my to-do list for this weekend, I’m so in love. Enjoy! I love the idea of marquee letters, and according to Pinterest, so does everyone else. Materials needed: Large cardboard letter (JoAnn’s is the best place to find one) X-acto Knife. Fantastic Cleaners. DIY Sliding Knot Bracelet.
After visiting the Mediterranean twice this past year, I’ve come to embrace the ubiquity that is the evil eye symbol and have since integrated it into the jewelry repertoire.

Today I’ll be showing you how to make a sliding knot bracelet with an evil eye charm, which is thought to protect against negative energy and evil powers. And whether you’re superstitious or not, this is a super simple method which can be applied to any connector or charm! You’ll need: Thread 4 inches of cord through one side of the charm. Fold 2 inches of cord back on itself and then again to create a zig zag. Fold an inch of the tip down over the parallel cords. Thread the tip through the opening of the left loop. Push the coil to the right and pull the tip until the knot is tight. Thread the other end of the cord through the opposite side of the charm and create the same zig zag. Coil the tip around all the cords three times and thread the tip through the loop. Melt the ends with a lighter. DIY Bracelet Tutorials. 137782069820035576_EDW5lbLP.jpg (JPEG Image, 268 × 400 pixels)
260716265898454637_RTx0JonF_f.jpg (JPEG Image, 319 × 350 pixels)