
Pleated Pillow Covers. I’ve been on a pillow kick again.

It’s a strange addiction. But I love the texture that this pleated pillow gave to our chair. Nice crisp pleats. A perfect way to liven up furniture. Want to pleat your own pillow cover? I was covering a 20 x 20 inch pillow, so I needed to come up with a finished pleated piece that was 21 x 21 inches, to have enough for a seam allowance on all sides. Then I marked every 1 1/4 inches along the edge of the 60 inch side. Then I folded along one row of marks and made a 1/4 inch seam along the fold. When opened up, it looked like this. Then I continued along, making more and more 1/4 inch seams, folding right where the marks were. Until I had enough seams to stretch 21 inches. Make sure and iron/steam your pleats completely flat, and pull the fabric as you are ironing……to be sure that you are not puckering the fabric underneath. (Iron flat before cutting the excess fabric off.
Here’s a look from the back… And then toss onto that chair. Gathered-heart-pillow. Last week was butt freezing cold here. like in the negatives. so i needed something to keep me busy and happy in the house. and well valentines being around the corner...well when you are a crafter and trying to create things for the holiday... it's right around the corner.this little pillow is fast and easy and well, a happy maker in freezing temps.lets get started: materials needed:a strip of pink or red fabric approx size of 6" by 12"two squares of muslin (i used sandcastle fabric i had on hand in my stash) cut to around 10" by 10". okay now lets get started with the sewing: first you are going to put your machine on the running stitch. mine is a #5.sew a 1/4" seam along both of the long sides of your pink fabric.
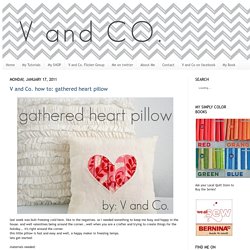
**while you are sewing your running stitch, hold slightly your thread up above, by the spool of thread. this will create your gather as you go. Wavy Ruffle Pillow Tutorial. So, I kind of have the impression that you like this pillow. :) I'm so happy.

It's been featured and pinned all over the place, and for that I am forever grateful. I thought, since it was so popular and all, that you might like the deets about how I made this ruffilicious thing of beauty. Ruffles. Pillow!
I started with one of my old t-shirts, cutting 1 1/2 in wide strips from it. Gathered Pillow Covers. You know I’ve made pillow slipcovers before…..here. But this time I wanted some real texture on my pillow. I have seen this gathered technique on pillows at the store…..and gave it a try at home. And came up with this: Flower pillow. If you are curious what this post is all about, click here for the {before} I knew I wanted to make each of the new pillows for the couch textural and different from each other.

When I saw this tutorial from Tonia at The Gunny Sack on Someday Crafts, I knew right away it would be one of them. Gorgeous, right? Here's how mine turned out: Bow. Mosaique parade. Remember the Blogger's Party pillows?

Ever since these pillows were shipped off to the rightful winner I have been under considerable pressure to make some patchwork pillows for my daughter. Regular reminders and subtle suggestions as to what my next project should be, her need for homemade pillows quickly made its way to the top of the list. Of course. I am not complaining though and have used my daughter's request as an opportunity to play around with color and quilting designs. I've had fun! The quilting itself takes a little longer. Prior to pin basting. For the back of the pillows I have cut up a duvet cover - my favorite Orla Kiely design - which is the same as my daughters bedding. Let's just say she was a very happy and grateful recipient! Linking up today with many more Creative Spaces - here. Rita with my apologies for massive picture overload!
Heart Felt Pillow. I have been floored at how many of you have made your own amazing versions of the heart felt wreaths!

It has been fun to visit all of the links you have shared with me! Thank You! I had some felt that I needed to find a purpose for from my Studio 5 appearance. So I decided to make a pillow using the same technique with the folded circles. (Sorry about the bad picture, it is the best I could do…we need some sunshine around these parts). It took about the same amount of time as the wreath. My pillow insert measured 12 x 16 inches. I then took one peice of fabric and drew a heart that would be the outline for shaping my heart. Then, when you finish, place the right sides of your fabric together and sew a 5/8 inch seam around the edge and leave an opening on one whole side.